The Owl Journal
Mounting a Garmin to an Accessory Rail
Step-by-Step Guide to Mounting a Garmin Tread on Your Sprinter Van
Step 1: Understand the Garmin Tread Setup
- The Garmin Tread is an ideal tool for off-road adventures in your Sprinter Van, offering satellite communication and maps for your favorite trails.
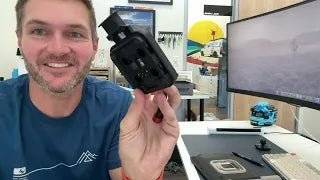
- It comes with a large factory Garmin ball mount, which isn't compatible with most common accessory rails, including those found on Sprinter Vans.
Step 2: Gather Materials
- Garmin Tread unit with factory ball mount.
- 1-inch RAM ball (if using RAM mounts) or 20mm bullet-point aluminum ball (available on Owl’s website).
- Screwdriver, ratchet, or open wrench (size 7mm for Garmin bolts).
- Optional: Carbon fiber arms if you want to extend the mount further from the dash.
Step 3: Remove the Factory Garmin Ball
- Using a screwdriver and a 7mm ratchet, undo the four bolts that connect the large Garmin ball to the Garmin Tread mount.
- Once the bolts are removed, set aside the large factory Garmin ball.
Step 4: Install the RAM or Bullet Point Ball Mount
- Depending on your setup, you can now replace the large Garmin ball with either a 1-inch RAM ball or a 20mm bullet-point aluminum ball.
- Align the ball mount with the existing bolt holes on the Garmin Tread mount.
- Insert the bolts through the Garmin Tread mount and attach the ball mount. Use the washers and nuts provided with the ball mount.
Step 5: Tighten the Mount
- With all four bolts in place, tighten them using your screwdriver and ratchet to secure the ball mount to your Garmin Tread.
- Ensure everything is tight and stable to prevent movement during off-road driving in your Sprinter Van.
Step 6: Mount the Garmin Tread to Your Sprinter Van Accessory Rail
- Attach the Garmin Tread (now equipped with the new ball mount) to your Sprinter Van’s accessory rail.
- If using the female version of the mount, it can directly attach to the accessory rail.
- If using the male version, you may need a carbon fiber arm to create some distance from the dash.
- Tighten the mount on the accessory rail, ensuring it's secure and positioned as you like.
Step 7: Power the Garmin Tread
- The Garmin Tread can be powered through the cigarette lighter of your Sprinter Van or via USB-C for a more permanent connection.
- Plug the USB-C cable into the designated slot on the Garmin Tread, making sure it’s securely connected.
Step 8: Customize and Adjust the Mount
- Once mounted, adjust the Garmin Tread to your preferred viewing angle by rotating it on the ball mount.
- Test the stability of the mount by moving the Garmin slightly and ensuring there’s no excessive movement while driving your Sprinter Van.
By following these steps, you'll have securely mounted your Garmin Tread on your Sprinter Van, ensuring easy access to satellite communication and off-road maps during your adventures.
Remember, if you have any questions, we have our van experts standing by at all times. Give us a call at (866) 695-8267 and we'll be happy to help you.
No call centers, no out of state representatives - just our van experts at our HQ in Arizona.
More soon,
John Willenborg


